Rainwater harvesting with the Ecomaxx
Rain Water harvesting Using the Ecomaxx Range
The Range
(£2,080.80 inc VAT)
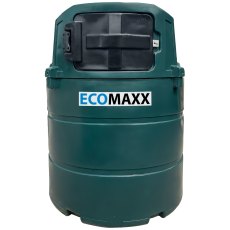
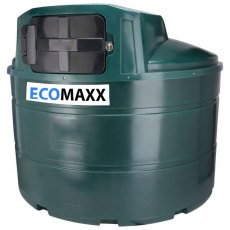
1340 Litre Ecomaxx
The Range we can offer in the Ecomaxx is our leading seller in the range the 1304l, EcoMaxx 1340, We also offer a 2350l and the 3500l versions,
These tanks can be used for a variety of applications watering gardens washing cars running outside taps and toilets washing machines and lots more,
If you select the mains water top-up we offer, you will never run dry thought the dryer months of the year,
(£2,499.60 inc VAT)
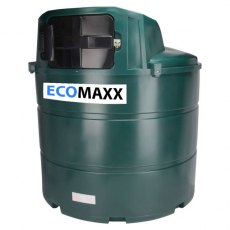
2350 Litres Ecomaxx
Using The 2350l you get more storage and the same great design, with only a 1700mm diameter will still fit nicely down the side of a shed or behind a garage, still featuring the same 3 Walrus HQ pumps to complete a reliable system.
(£3,000.00 inc VAT)
3500 Litre Ecomaxx
The biggest tank in the Ecomaxx range is the 3500l with its squat design is able to be placed behind a fence or wall. All the Ecomaxx range can be fitted with a main top-up system, so you never run low on the water even through the hottest of summers, keeping your garden looking amazing all year round,
RAINWATER FILTER COLLECTOR WITH UNIVERSAL LINK
Filter collector
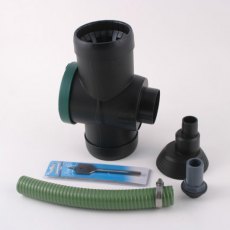
Rainwater Filter Collector and Universal Link Kit
The Filter Collector can connect to any tank or water butt with the aid of the Universal Link Kit. The Filter and the link kit are packaged together and contains everything needed for installation. Manufactured by 3P Technik. Suitable for roof sizes up to a maximum of 90 sq metres. This includes 30cm of reinforced green spiral hose, rubber washer, back nut and cutting tool.
The Universal Link Kit is also available in larger sizes such as 1, 2 and 5 meters (please contact us for more details). Filters and collects rainwater for the best possible water quality. Once the tank is full, the filter acts as the overflow outlet. The Filter Collector leads cleaned water to the storage tank, with high efficiency under normal rainfall. The dirty water and debris then continue on to the down-pipe. Removes leaves and so reduces the risk of disease carry-over.
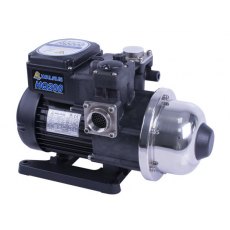
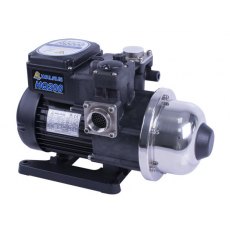
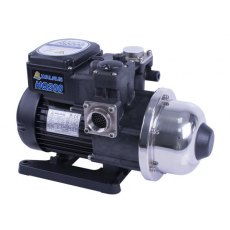
Walrus HQ pump
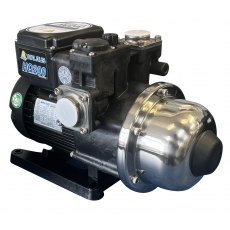
The HQ Series pumps as designed for water supply and boosting water pressure in residential, commercial, and light industrial applications where low or inadequate water pressure exists. The HQ Series is suitable for boosting pressure from either underground or surface water supplies.
The HQ Series is an all-in-one unit which consists of a pump, motor, pressure tank, and electronic controller, giving you a plug-and-play system. The built-in electronic controller provides constant pressure, which ensures the pump starts automatically when water is consumed and continues to operate until water demand has ceased.
Operating Conditions:-
- Ambient temperature: Max. +40°C
- Liquid temperature: +4°C ~ +40°C
- System Pressure : Max. 8.5 kg/cm²
- Relative humidity: Max. 85% (RH)
- Under normal operation, it is not necessary to adjust the pressure unless the cut in pressure is higher than the pre-set activation point (refer to specification).
What is Rainwater Harvesting?

Off Grid Living
Frequently Asked Questions
Water Tanks
Rainwater Harvesting
What is Rainwater Harvesting?
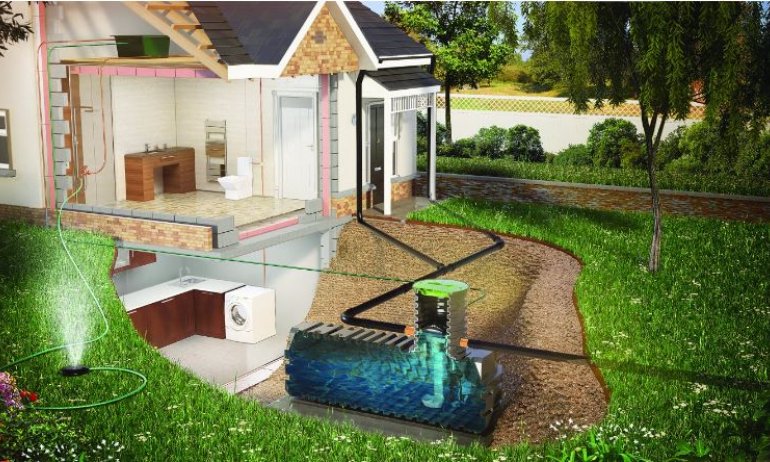
Rainwater harvesting is the collection and storage of rainwater, instead of letting it be dispersed into the ground. There are various rainwater harvesting methods available but generally rainwater is collected from roof-like surfaces and redirected to a rainwater harvesting tank, either above the ground or below.
Rainwater harvesting has traditionally been used for watering the garden but, thanks to new technology, a rainwater harvesting system can be plumbed into your home’s existing pipework so that you can harvest rainwater to flush your toilets, wash your clothes and many other non-human consumption related applications. According to the Rainwater Harvesting Association, you could reduce your water consumption by as much as 40% which will lower your water bills if you’re on a water meter.
What are the benefits of having a water butt?
A water butt, also known as a rain barrel, is a container used to collect and store rainwater that falls on rooftops. There are several benefits to having a water butt. Collecting rainwater in a water butt allows you to reuse it for various purposes, such as watering your plants, washing your car, or cleaning outdoor spaces. This reduces your reliance on tap water, which is often treated and requires energy for purification and distribution. Using rainwater from a water butt can help conserve water and reduce your overall water usage, leading to cost savings on your water bill.
Rainwater is naturally soft and free from the chemicals commonly found in tap water, such as chlorine and fluorine. Using rainwater collected in a water butt for watering your plants provides them with natural, untreated water, which can be healthier for their growth and development.
During periods of water scarcity or drought, having a water butt can provide you with a stored source of water for essential outdoor tasks, such as watering your garden or washing your car, even when water restrictions may be in place. This can help you maintain your outdoor spaces and reduce your impact on local water resources during times of water shortage.
How does a water butt work?
A water butt is typically positioned under a downpipe or gutter on your roof. When it rains, water from the roof flows into the gutter and down the downpipe, and then into the water butt through a diverter or downpipe connector. Some water butts may also have a built-in filter to prevent debris, such as leaves and twigs, from entering the water butt and contaminating the stored water.
Once the rainwater enters the water butt, it is stored in the container until you are ready to use it. At Tanks Direct, we offer a range of water butts in various sizes, from 110 to 340 litres. Water butts are typically equipped with a tap or a hose attachment near the bottom of the container, allowing you to access the collected water easily. Some water butts may also have an overflow outlet near the top to prevent overflow during heavy rainfall.
You can use the stored rainwater in your water butt for various purposes, such as watering your plants, washing your car, or cleaning outdoor spaces. Depending on the design of your water butt, you can either use a tap to fill watering cans or connect a hose to the hose attachment to distribute the water directly to your garden or other areas.
How long can you keep water in a water butt?
The length of time you can keep water in a water butt depends on various factors, such as the size and material of the water butt and the quality of the collected rainwater. In general, rainwater stored in a properly maintained water butt can be kept for several weeks to several months. However, it's important to note that rainwater is not treated or purified, and over time, it may become stagnant or develop algae, which can affect its quality.
The quality of the rainwater collected in a water butt can vary depending on factors such as air pollution, debris, and contaminants from the roof or gutters. It's recommended to use a water butt with a built-in filter or add a filter attachment to the downpipe to help minimise debris and contaminants from entering the water butt. Regularly checking and cleaning the water butt, including the filter, can help maintain water quality.
If you use the stored rainwater in your water butt regularly for watering plants or other purposes, the water turnover will be higher, and the water is less likely to stagnate. Using the collected rainwater regularly can help ensure that the water remains fresh and reduces the risk of water quality issues.
Regular maintenance of the water butt is important to ensure the water remains clean and fresh. This includes checking the water butt for debris or sediment build-up, cleaning the container and filter as needed, and ensuring that the tap or hose attachment is in good working condition. Following the manufacturer's instructions for maintenance and cleaning is recommended.
It's generally recommended to use up the stored rainwater in a water butt within a few weeks to a few months to ensure optimal water quality. If you have concerns about water quality or if the water in your water butt appears discoloured, has an odour, or shows signs of contamination, it's best to discard the water and clean the water butt thoroughly before collecting new rainwater.
Can you drink rainwater from a water butt?
While rainwater is generally considered safe for many uses, including watering plants and cleaning outdoor spaces, it's not recommended to drink rainwater from a water butt without proper treatment. Rainwater collected in a water butt is not typically treated or purified and may contain various contaminants that can pose health risks if ingested.
Rainwater can pick up contaminants from the roof, gutters, and other surfaces as it flows into the water butt, including dust, pollen, bird droppings, leaves, and other debris. In addition, air pollution and environmental contaminants can also be present in rainwater, especially in urban areas. These contaminants can potentially affect the quality of the collected rainwater and make it unsafe for drinking without proper treatment.
How to install a water butt?
Installing a water butt involves several steps to ensure proper setup and functionality.
- Select a location for your water butt that is close to a downpipe or a rainwater source, such as a roof or gutter. The area should be level and stable to support the weight of the water butt when full. Consider accessibility for maintenance and ease of use, such as attaching a hose or filling watering cans.
- Clear the area of any debris, vegetation, or obstacles that may interfere with the installation or use of the water butt. Ensure that the ground is level and stable.
- Install a rainwater diverter to divert water from a downpipe into the water butt. Follow the manufacturer's instructions to install the diverter, which typically involves cutting a section of the downpipe and attaching the diverter using screws or clips. Make sure the diverter is securely fitted and positioned properly to direct water into the water butt.
- Place the water butt in the chosen location and ensure that it is level and stable. If the water butt has a stand or pedestal, assemble it according to the manufacturer's instructions. Some water butts may also require additional brackets or supports for stability.
- Connect the hose or pipe from the rainwater diverter to the inlet of the water butt. Make sure the connection is tight and secure to prevent leaks.
- If the water butt has an overflow port, it's important to install an overflow pipe or hose to direct excess water away from the water butt and prevent overflow. Follow the manufacturer's instructions to attach the overflow pipe or hose securely and direct it to a suitable drainage area.
- Install a tap or hose attachment at the base of the water butt to allow for easy access to the stored rainwater. Follow the manufacturer's instructions to install the tap or hose attachment securely and ensure that it is positioned properly for convenient use.
- Once the water butt is installed, fill it with water to check for any leaks or drips. Fix any leaks or issues before using the water butt.
You will need to ensure your water butt is properly maintained by regularly checking for debris, cleaning filters or screens, and ensuring that the tap or hose attachment is in good working condition. Follow the manufacturer's instructions for maintenance and cleaning to ensure optimal performance.
Do you need planning permission for a rainwater tank?
Generally, rainwater harvesting tanks are considered "permitted development" and do not require formal planning permission, provided they meet specific criteria related to size, location, and impact on the property. For domestic properties, rainwater tanks are typically allowed without planning permission if they are located within the curtilage of your property, do not exceed certain height restrictions, and do not cover more than a specified percentage of the total land area. This means most homeowners can install rainwater tanks in their gardens or near their houses without seeking additional approvals.
However, there are important exceptions to this rule. If your property is located in a conservation area, is a listed building, or is in an Area of Outstanding Natural Beauty, you may need to obtain planning permission. Additionally, if the rainwater tank would be visible from a public highway or would significantly alter the external appearance of your property, local planning authorities might require you to submit a planning application.
To ensure compliance, it's recommended to consult your local planning authority before installing a rainwater tank. They can provide specific guidance based on your property's unique characteristics and location. In most cases, homeowners can proceed with installing rainwater harvesting systems without formal planning permission, but it's always best to verify the specifics with local planning officials.
How do you keep water fresh in a rainwater tank?
To keep water fresh in a rainwater tank, start with proper initial filtration. Install high-quality filters at the tank's entry point to remove debris, leaves, and contaminants before water enters the storage system. These filters prevent organic matter from decomposing inside the tank, which can lead to bacterial growth and water degradation.
Implement regular maintenance routines, including periodic tank cleaning and inspection. This involves draining the tank completely every one to two years, removing sediment buildup, and checking for any signs of algae or bacterial growth. Use food-grade tank cleaning solutions or chlorine treatments to sanitise the interior surfaces and prevent microbial contamination.
Protect your rainwater tank from direct sunlight, which can promote algae growth and water temperature fluctuations. Use opaque or dark-coloured tanks or install the tank in a shaded area. Additionally, ensure the tank has a tight-fitting, sealed lid to prevent external contaminants, insects, and small animals from entering the water supply.
Consider installing a first-flush diverter system, which redirects the initial rainfall away from the storage tank. This initial runoff typically contains the highest concentration of pollutants, dust, and debris from your roof. By separating this first batch of water, you significantly improve the overall water quality and freshness of the stored rainwater.

 Login
Login